Tenant improvement plumbing follows a clear path: design, permits, underground rough-in, in-wall rough-in, fixtures, and final inspections. Each step depends on the one before it, and each one has its own checkpoints. When the steps flow, the space opens on time. When they stall, the whole build-out waits. This article explains each stage in order, with tips to keep your project moving.
Whether you are a tenant, landlord, or general contractor, use this as a roadmap for your next commercial build-out.

Stage 1: Design for Tenant Improvement Plumbing
Design sets the foundation for everything else. In this stage, the architect places fixtures and the plumbing engineer sizes the systems. Together, they produce the drawings the city will review.
Key design tasks include:
- Counting required fixtures based on occupancy
- Locating restrooms, sinks, and equipment
- Sizing drains, vents, and water lines
- Choosing water heater type and location
- Planning grease, backflow, or other special systems
- Checking accessible fixture layouts
Smart design also looks at cost. For example, stacking or grouping wet areas cuts the length of drain runs. Likewise, placing restrooms near the existing sewer stub saves trenching.
Stage 2: Field Verification
Drawings are only as good as the information behind them. So before finalizing design, a plumber should verify existing conditions. That means locating the sewer connection, checking its depth, finding the water service, and noting vents and cleanouts.
A sewer camera can also reveal the condition of old lines. Cracked or sagging pipes may need replacement. Finding them now is far cheaper than finding them after the floor is poured.
Stage 3: Permits and Plan Review
Next, the drawings go to the city for review. Plumbing is usually part of the main building permit. Reviewers check fixture counts, pipe sizing, venting, water heater safety, and accessibility. Most cities base these rules on a model code, such as the plumbing code from IAPMO or the ICC.
Comments are normal. Respond quickly and completely to keep the review moving. Meanwhile, the contractor can order long-lead items like fixtures, water heaters, and interceptors. Running these steps in parallel saves weeks.
Stage 4: Underground Rough-In
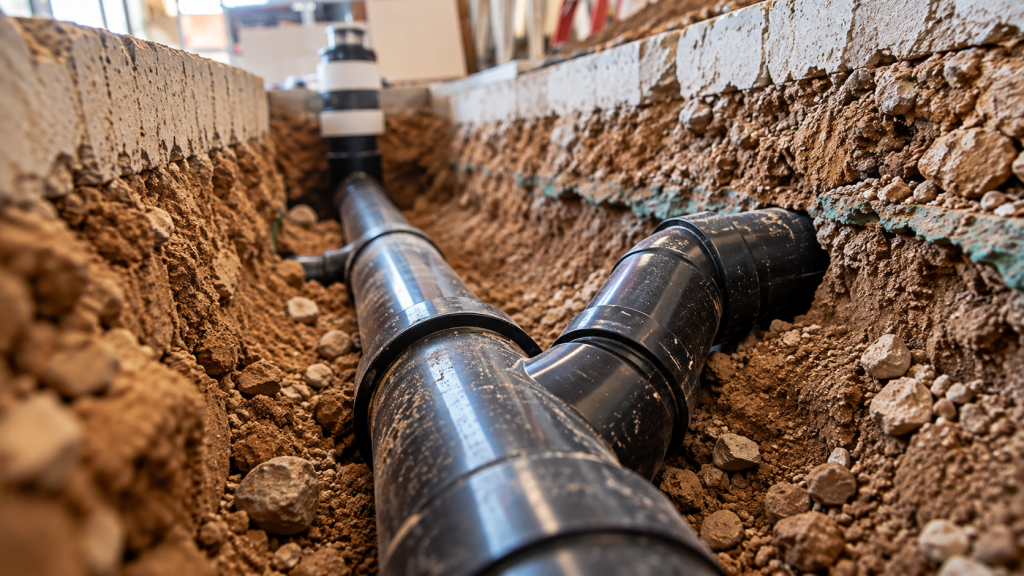
With a permit in hand, crews start below the floor. This is where tenant improvement plumbing does its heaviest work.
- Mark drain routes on the slab.
- Saw-cut and remove the concrete.
- Dig trenches to the right depth.
- Lay waste and vent piping at the proper slope.
- Test the system with water and pass inspection.
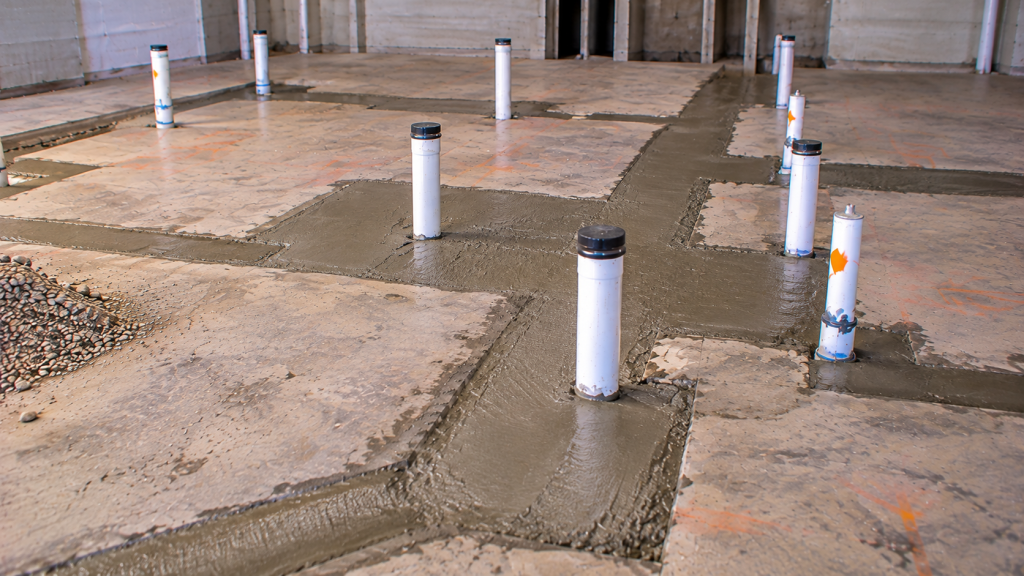
- Backfill, compact, and pour new concrete.
Slope is critical. Drains need a steady fall toward the sewer so waste flows freely. Too little slope causes clogs. Too much can leave solids behind as water rushes ahead.
Stage 5: In-Wall Rough-In and Top-Out
Once framing is up, plumbers run pipe inside the walls. They install drain arms, vents, and water lines to every fixture. They also set carriers for wall-hung fixtures and blocking for grab bars.
At the end of this stage, the system gets a pressure test. Water lines hold pressure for a set time. Drains and vents may get a water or air test. When everything holds, the inspector signs off and the walls can close.
For a deeper look, read our guide to the top-out stage.
Stage 6: Water Heaters in Tenant Improvement Plumbing
Next, plumbers install water heaters, mixing valves, and recirculation pumps. They also connect special equipment. Examples include dishwashers, ice machines, coffee brewers, and medical sinks.
Each piece of equipment has its own needs. For instance, an ice machine may need an air gap at the drain. A commercial dishwasher may need high-temperature water. Read the equipment specs carefully and coordinate with the supplier.
Stage 7: Fixture Installation
Near the end, plumbers set fixtures. They hang sinks and toilets, install faucets and flush valves, and connect supplies and drains. Then they adjust each fixture for proper flow and check for leaks.
Fixtures go in after most finishes are done. That way, tile, paint, and counters do not get damaged. However, fixtures must arrive in time. Late fixtures are a common cause of delayed openings.
Stage 8: Final Inspections for Tenant Improvement Plumbing
The final inspection confirms the work matches the approved plans. The inspector checks fixtures, water heater safety devices, cleanout access, and accessibility. Any backflow assembly also needs a passing field test, done by a certified tester.
Other inspections may follow. For example, a food-service space may need a health department review. Once all finals pass, the city can issue approval to occupy.
Common Tenant Improvement Plumbing Delays
- Unverified existing conditions: Survey before you design.
- Incomplete drawings: Submit a full set to limit review rounds.
- Late orders: Buy fixtures and heaters during permit review.
- Failed tests: Check joints and slopes before calling inspection.
- Trade clashes: Hold weekly coordination meetings.
Who Does What
Clear roles keep tenant improvement plumbing on track. First, the engineer designs the systems. Next, the general contractor runs the schedule and coordinates trades. Then the plumber installs, tests, and calls inspections. Meanwhile, the owner approves fixtures and changes.
When each person knows their part, decisions move faster and problems get solved sooner.
Quality Checks Along the Way
Good plumbers check their own work at every stage. For example, they confirm slopes before backfill. Also, crews photograph pipe in walls before drywall. They label shutoff valves and cleanouts too. Above all, they test before the inspector arrives.
These habits catch small problems early. As a result, inspections pass the first time and the schedule holds.
Tenant Improvement Plumbing in Occupied Buildings
Many build-outs happen in buildings that stay open. Neighbors keep working while your suite gets new pipes. That adds a few extra steps.
First, plan any water shutdowns with the landlord. Shared risers may feed other tenants, so shutdowns often happen at night or on weekends. Second, control noise and dust. Saw-cutting concrete is loud, so crews may do it after hours. Third, protect shared halls and elevators with covers and mats.
Tie-ins to shared sewer lines need care too. A brief shutdown or a bypass may be needed while the new pipe connects. Good contractors explain these steps in advance, so no one is surprised.
Documents to Keep After the Job
When tenant improvement plumbing wraps up, collect a full closeout package. It should include:
- As-built drawings that show actual pipe routes
- Photos of in-wall and underground pipe
- Fixture and water heater manuals
- Warranty letters
- Backflow test reports
- A list of shutoff valve and cleanout locations
These records save hours on future repairs. They also help the next tenant, or your own future expansion, start on solid ground.
Budget Tips
Underground work drives most plumbing costs. So keep wet areas close to the sewer and to each other. Also, reuse sound existing lines when a camera inspection confirms their condition. Finally, choose standard commercial fixtures unless the design calls for something special. These simple choices often save a meaningful share of the plumbing budget.
FAQ on Tenant Improvement Plumbing
How many inspections does tenant improvement plumbing need?
Usually at least three: underground, rough-in or top-out, and final. Some projects add more for special systems.
Can design and permits overlap with ordering?
Yes. Ordering long-lead items during review is one of the best ways to save time.
Start Your Project the Right Way
A clear process makes plumbing predictable. Learn more about our plumbing contractor services, or contact our team to review your plans.